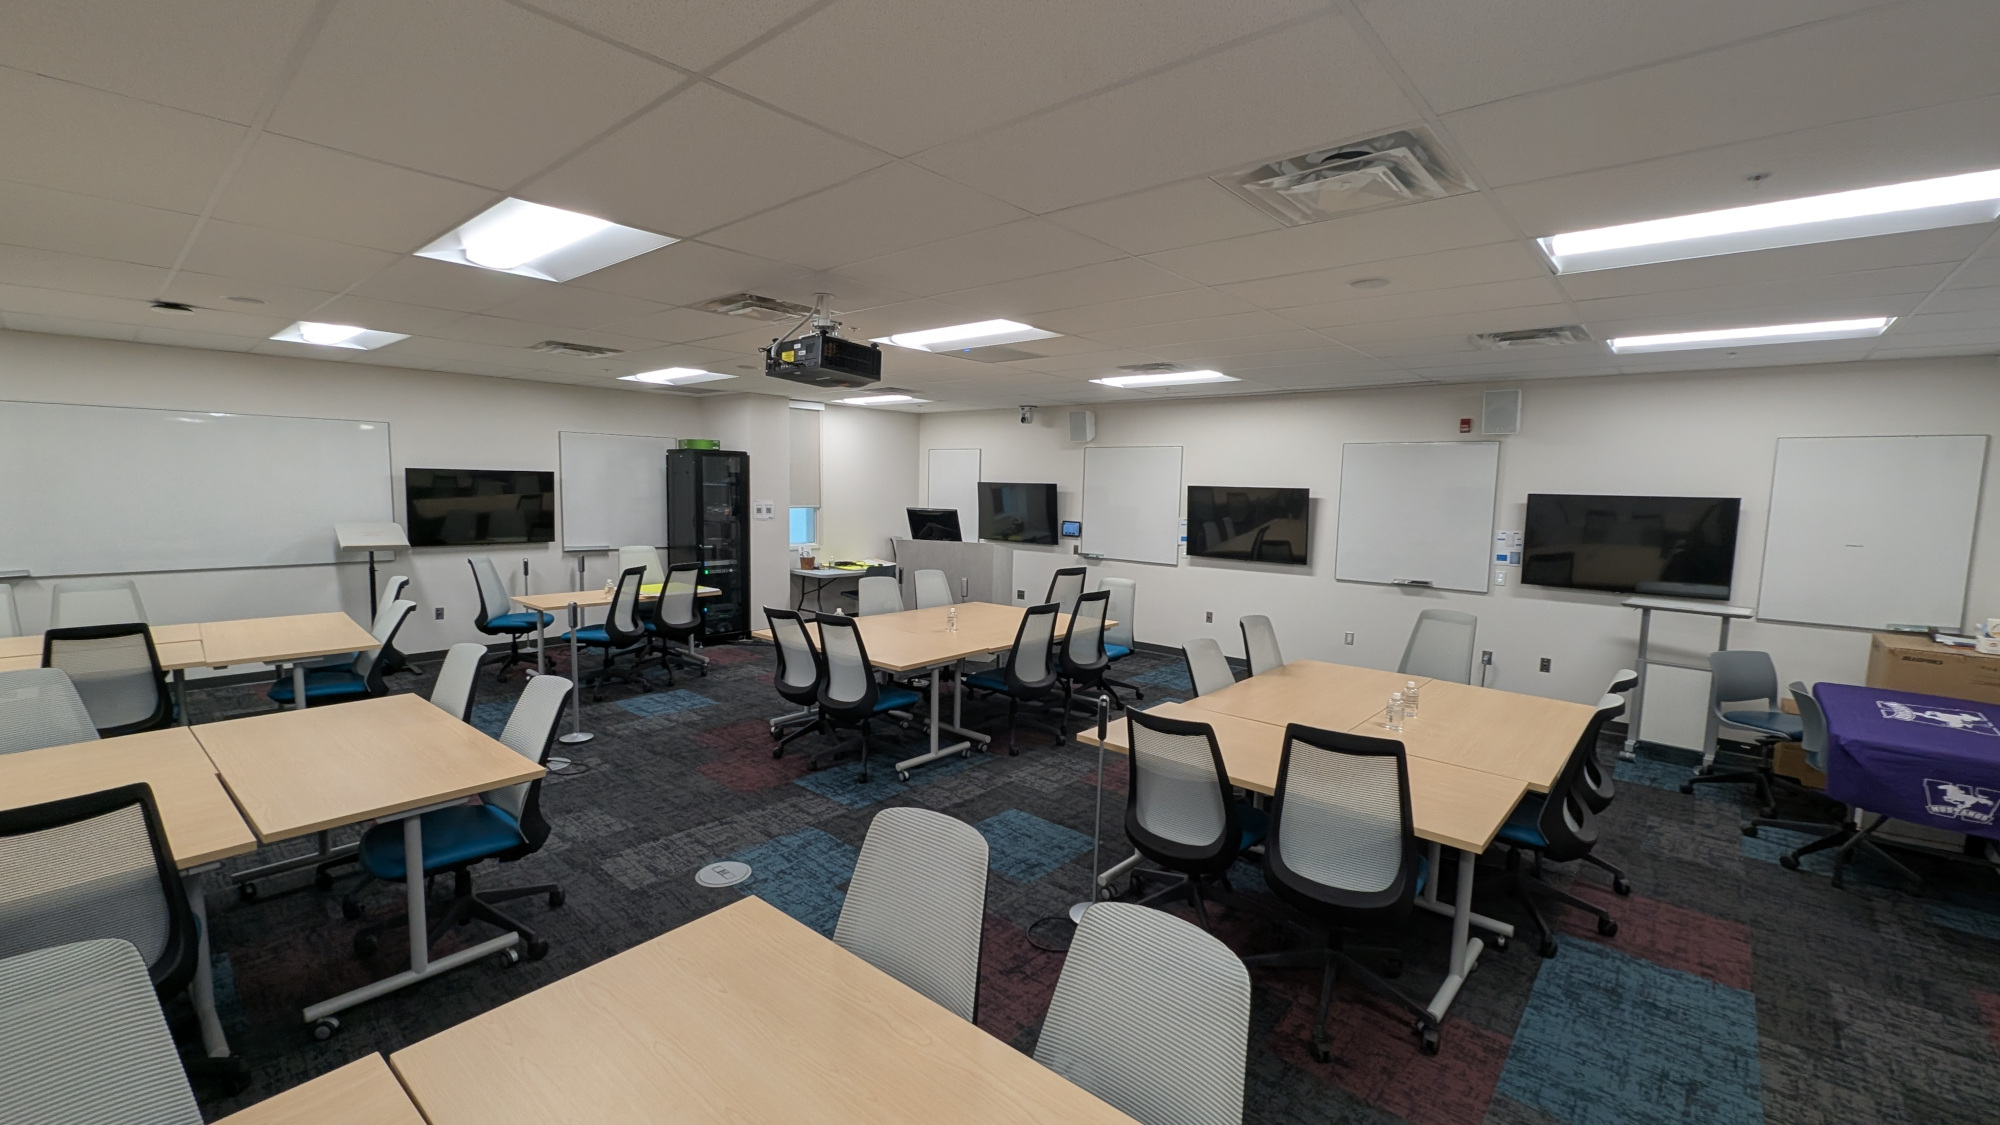
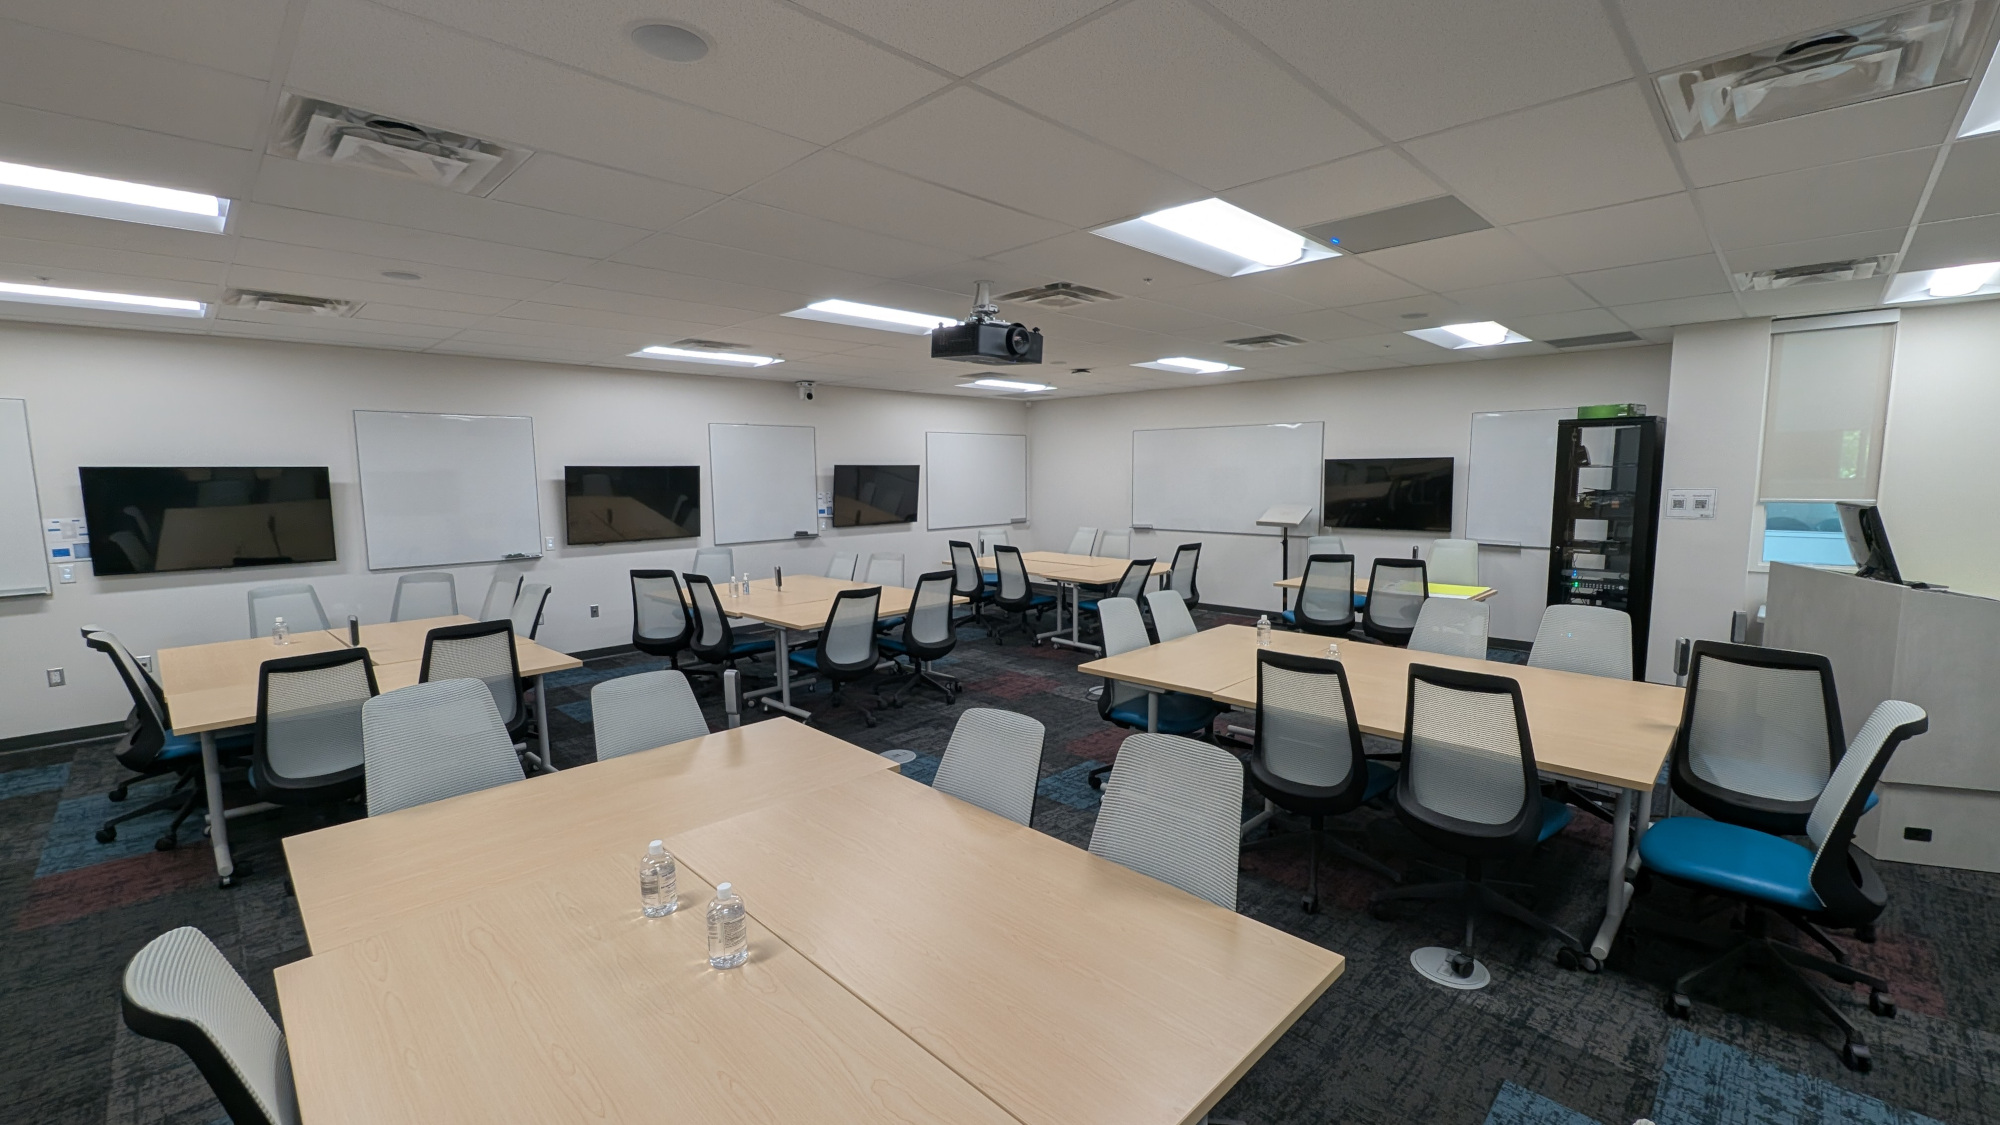
NCB 283
Capacity: 42
Room Type: Collaboration Space
Facilities:
- 7 x 55" LG TVs ( Wall Controls)
- Configurable tables and chairs arrangement
- Wireless connectivity
- HDMI connectivity
- Projector
- Motorized projection screen
- Whiteboards
- Light dimmers
- Portable power connectivity
You can also use Zoom with the hardware in this room. Please refer to this page for instructions.
Classroom Features Disclaimer
Images present a general appearance of the space and do not necessarily establish its capabilities and/or available affordances.
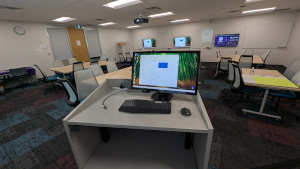
Using The Classroom
Control Panel
Most of the classroom functions are controlled from the AV Control Panel which is mounted in the front wall, to the left of the projector screen
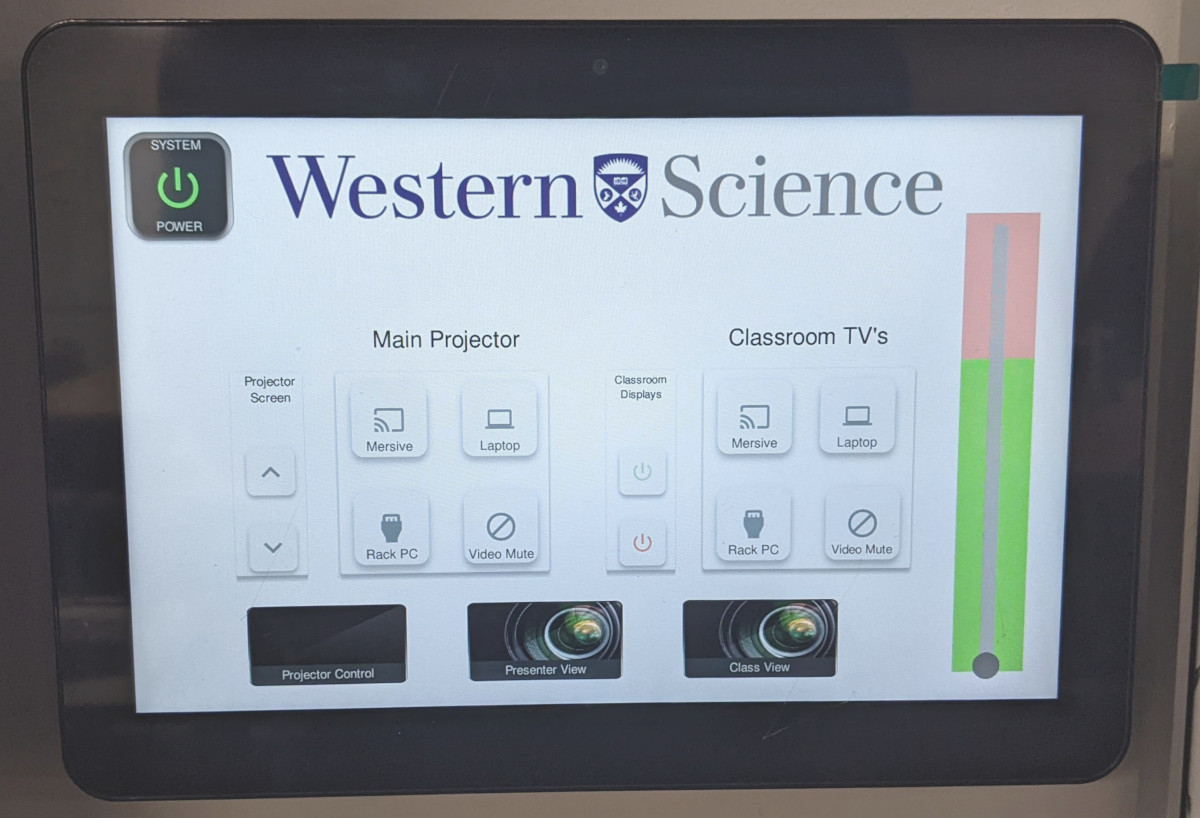
- Touch the System Power icon to Turn on the Projector, Turn on all the Classroom TVs, and Lower the Projection screen. Touch it again, to turn everything off
- On the left, under Main Projector you can choose what is displayed with the main projector: The Mersive Solstice ( Wireless Video option), The Rack PC, or a Presenter's Laptop, or you can Mute the signal.
- On the right side (the green/pink vertical bar) is the volume control.
- On the right, under Classroom TV's you can choose what is displayed on the classroom displays.
- There are also labelled manual controls to raise/lower the screen, and to power on/off the classroom TVs
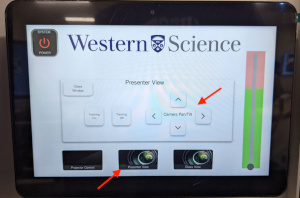
- Along the bottom of the display , there are also two icons labelled Presenter View and Class View. If you touch one of them, it will open a control panel where you can pan/tilt that camera. The Presenter camera is the rear camera, which faces the podium. The Class View camera refers to the front wall camera, which faces the room.

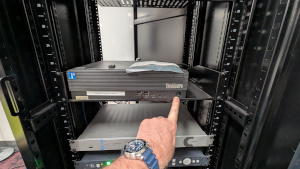
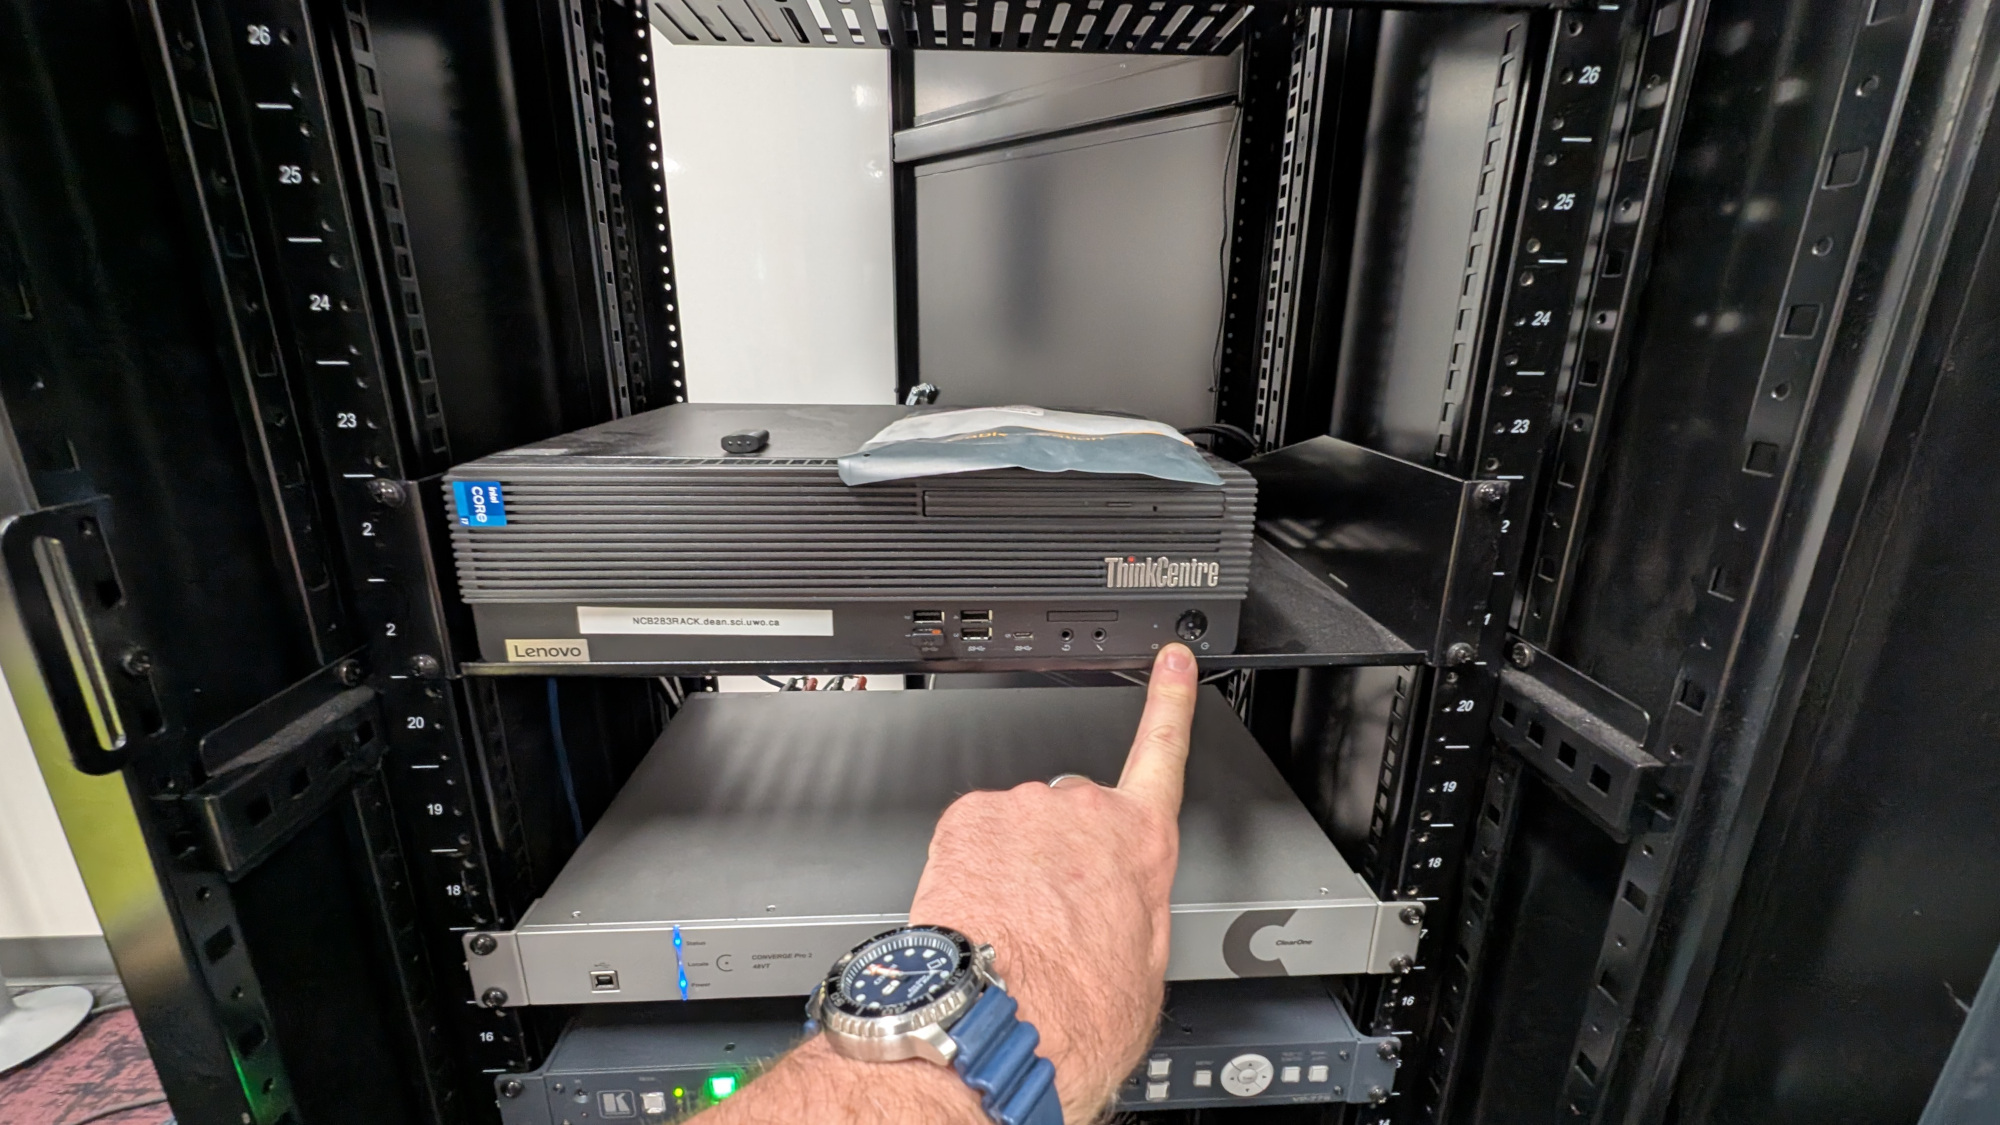
Podium + Rack PC
At the front of the room is a Lectern/Podium for the presenter.
- Please try to avoid stepping on the cables which connect the podium to the control rack.

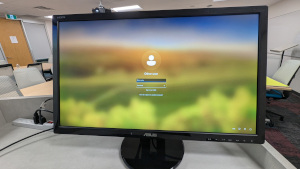
- On the podium is a display/keyboard/mouse for controlling the Rack PC. You can use your UWO username and password to login to the PC.
- The Podium is equipped with a powered lift. Simply tilt the black control up or down and the podium will raise or lower, such that you can set it to a desired working height
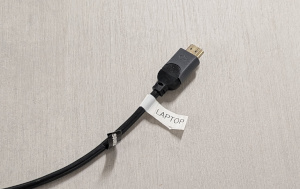
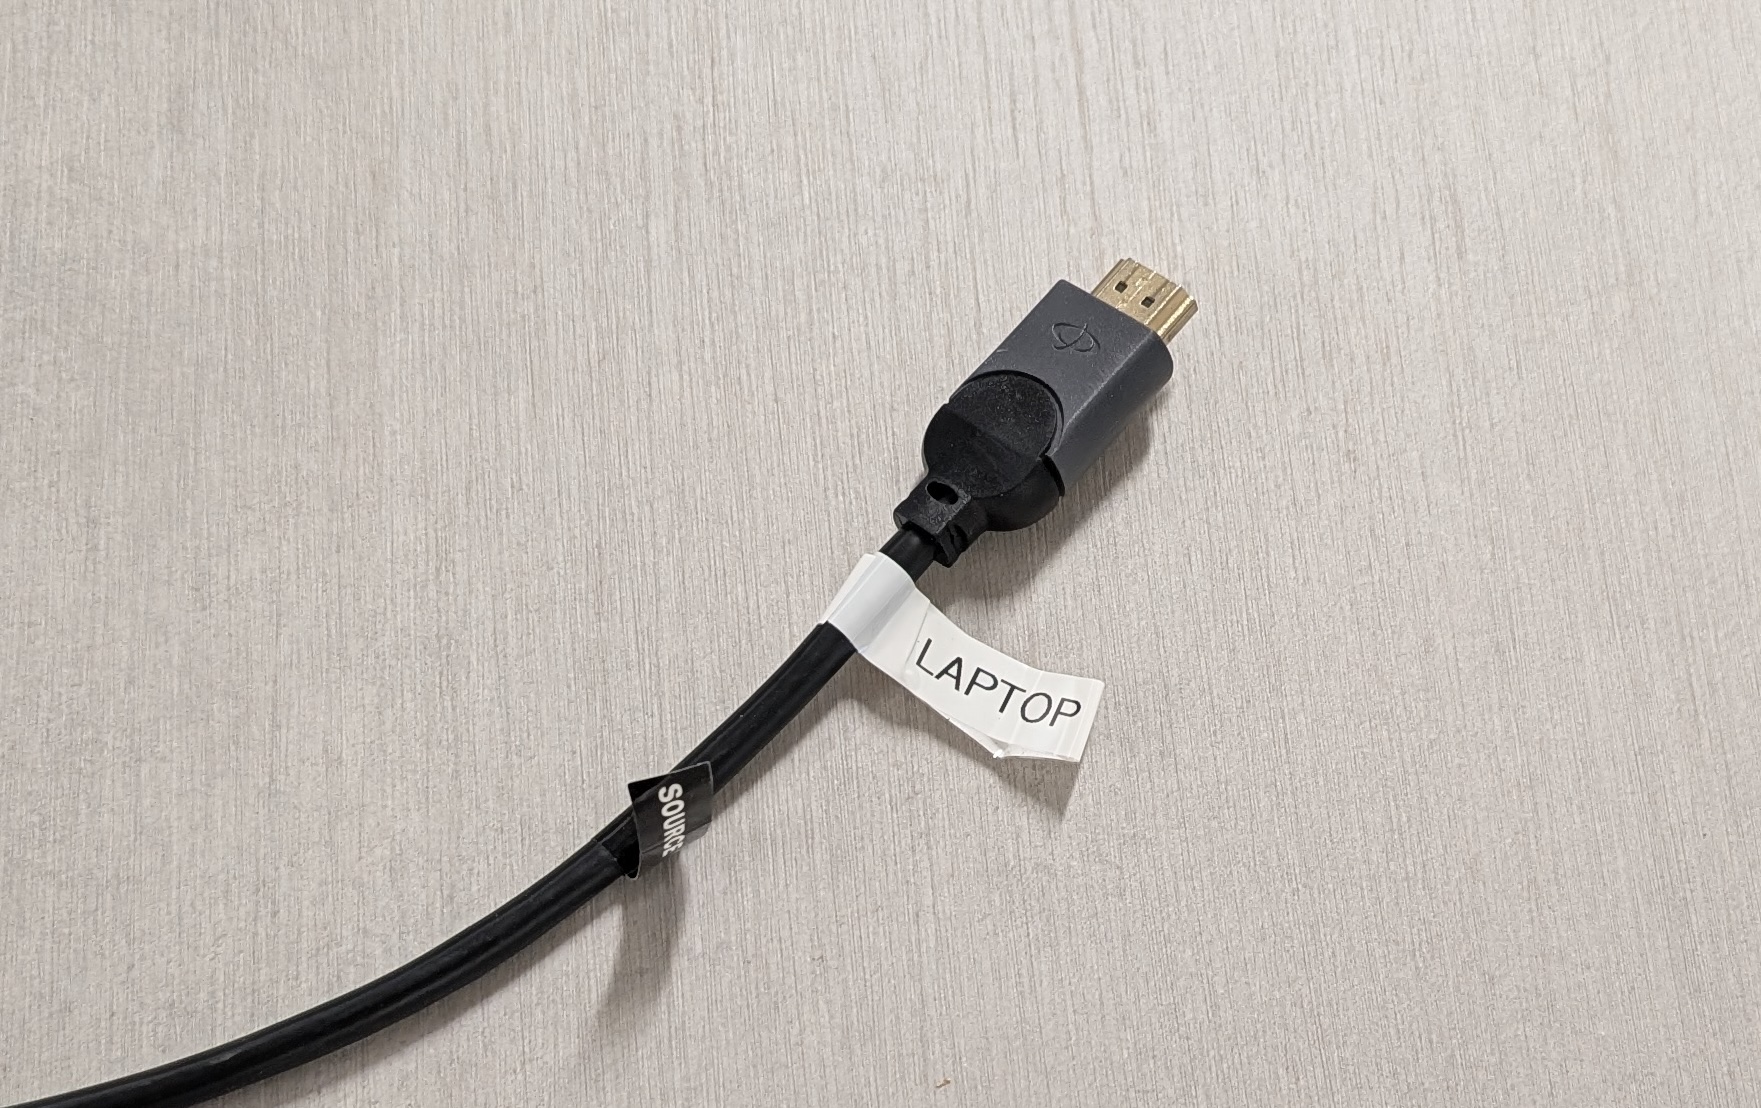
- Also on the podium is a labelled HDMI cable, for use with presenter laptops. This is connected to the Laptop option on the main control panel
- If the Rack PC is not powered on, you can open the rack and use the power button on the front of the PC. (The PC is located roughly in the middle of the rack).
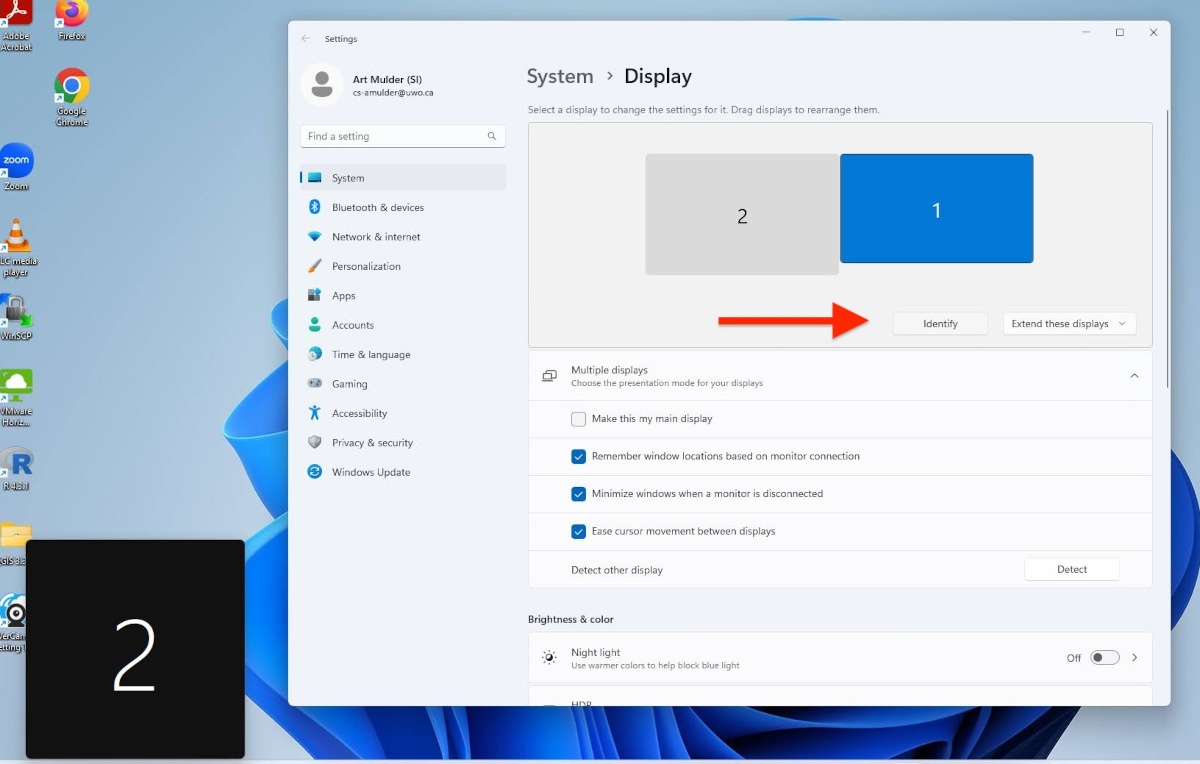
- By default, the Rack PC is set to Duplicate/Mirror its display to the room AV system. So, whatever is displayed on the Rack PC will also be displayed, or mirrored, onto the room projector, or TVs. (depending on how the AV signal is routed)
- If you want, you can right-click on the desktop of the rack PC to bring up a menu and choose Display Settings
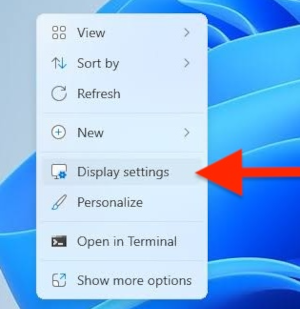
- Then you can select the drop-down menu and change the display from Duplicate these displays to Extend These Displays. Then you will have TWO displays -- the Rack PC Monitor will be one, and the AV system (typically the Projector) will be the second. Please be sure to set the PC back to the default Duplicate these displays when you are finished.


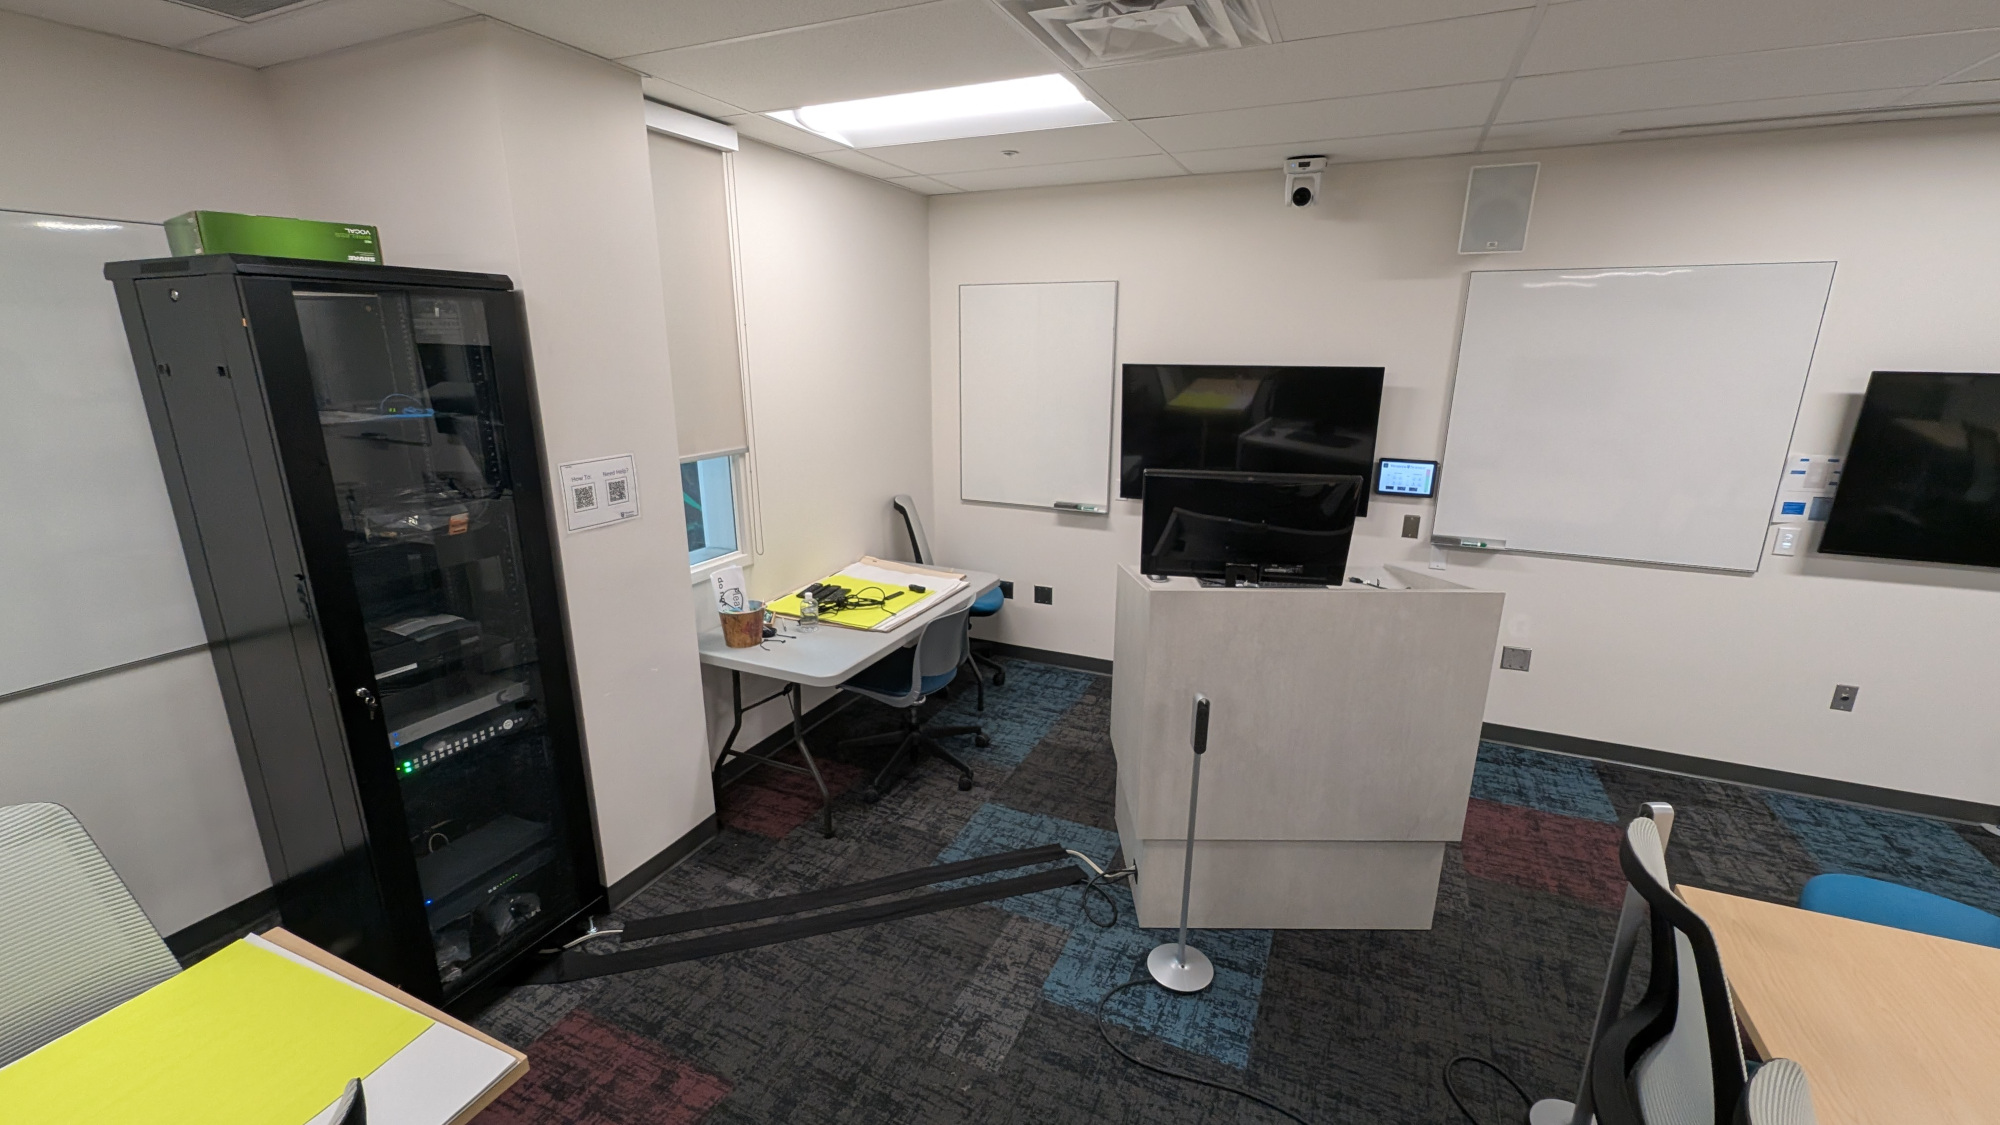


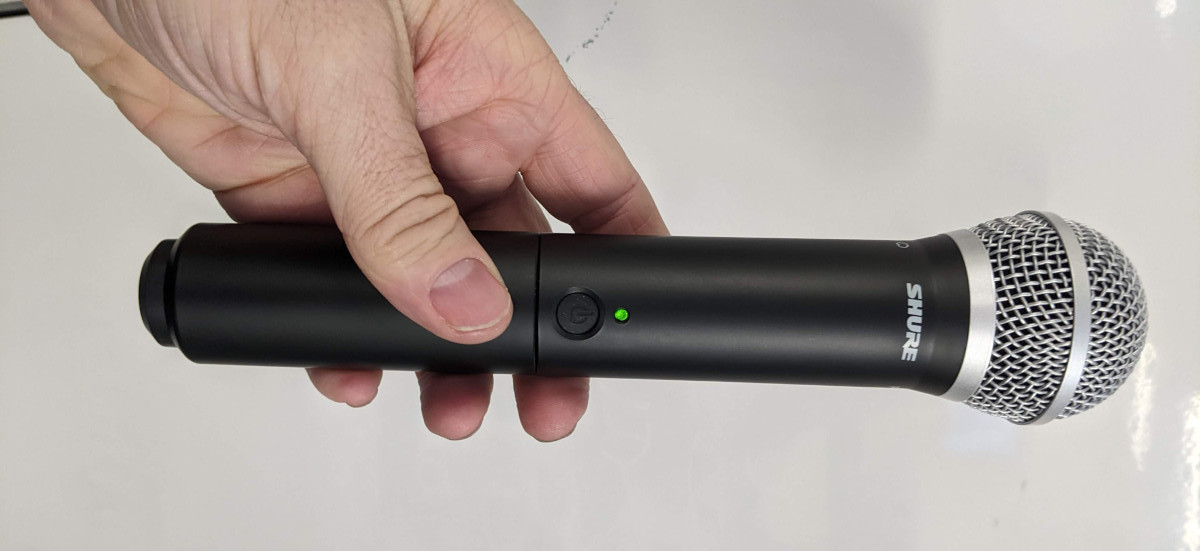
Hand held Microphone
The room is also equipped with a hand-held microphone. The microphone is stored on a shelf in the rack. Simply press the power button in the handle of the microphone. A LED light will turn green. The system should be automatically set to broadcast this signal through the room speakers. (sometimes it takes 1-3 seconds after you turn it on for the audio to start coming through the speakers.)
Laptop Problems / FAQ
One common problem is that presenters will connect their laptop to the laptop display cable and yet the image on the projector is not matching what is displayed on their laptop screen.
(See the "Control Panel" section above for instructions about powering on the AV system and hooking up your laptop.)
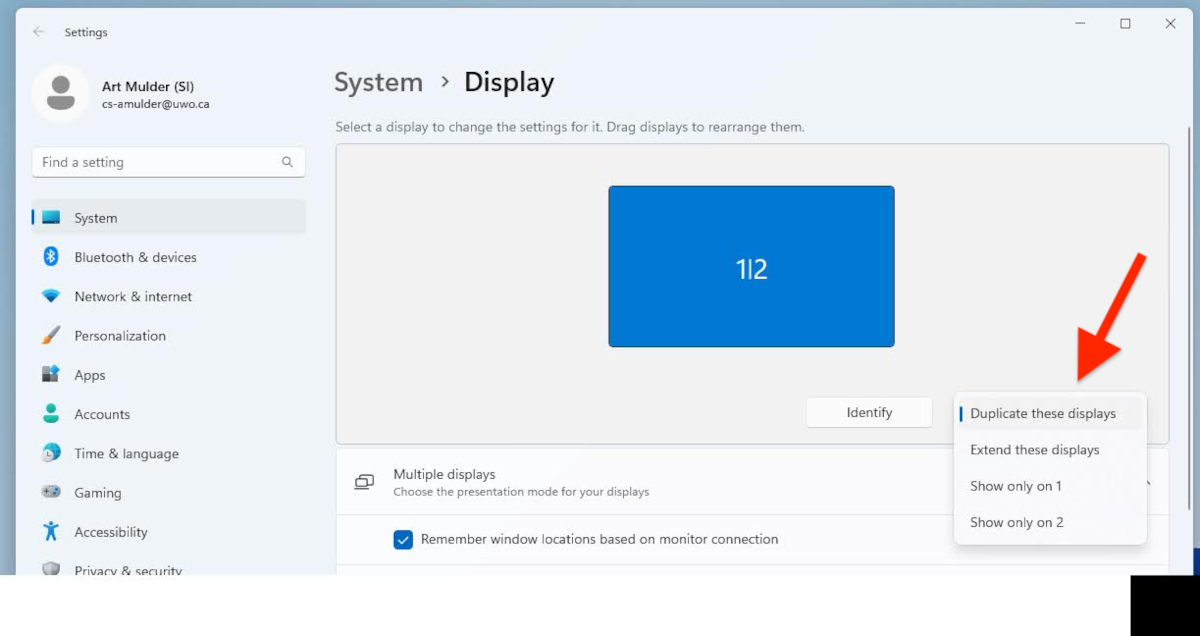
In this situation, it usually means that your laptop has been set to "extend" its display rather than "mirror/duplicate" its display. So your laptop screen and the projector screen are acting as one large monitor. You could just grab and slide a window from your laptop onto the projector screen, but that is not ideal. Instead, you should reset your laptop display so that it is set to "mirror/duplicate".
Windows:
On a windows laptop, you can right-click on your desktop to bring up a menu and choose Display Settings
Then you can select the drop-down menu and change the display setting to Duplicate these displays.
Macintosh:
On a mac you need to open up your "System Settings", then find the section on "Displays", and select "Mirror Displays"