Video Camera for Lending to Faculty of Science
STS has a Sony FDR AX700 video camera available for short term lending
How To Reserve
- Please submit a helpdesk ticket and request to borrow the camera. Our staff will check availability and respond with details.
- PLEASE NOTE: There is a maximum of one week rental (five business days).
- The Camera can be picked up at wsc140, specific pick-up and drop-off times will be arranged.
Included Equipment
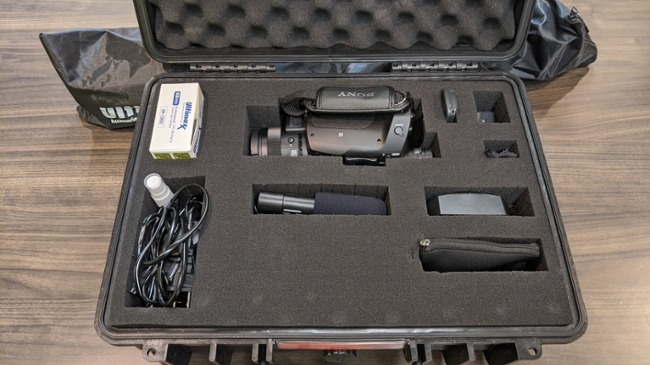
The camera is supplied in a padded hard shell case and includes the following items:
- The Camera itself
- A simple tripod (shown behind the case in the above photo)
- A power cord for recharging
- A shotgun Microphone (below the camera in the above photo)
- A lapel (or Lavalier) microphone with 12ft cable (In the pouch in the lower right section of the photo)
- Lens cleaning fluid (shown with the power cord)
Guidelines For Use
We are providing this equipment for your use; but we are not able to provide detailed instruction in videography. A help guide is available online from Sony, or available here as a PDF. A detailed instruction manual for the camera is also available as a PDF download.
The most important thing to remember is: Always test your audio at the start of your session.
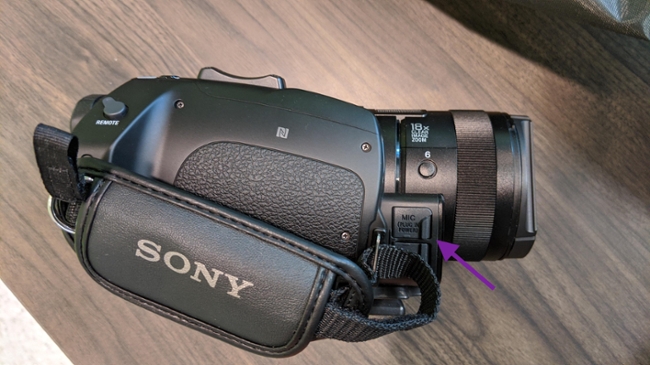
Here is a photo of the RIGHT side of the camera, showing where a microphone is to be connected. The camera does have a built-in microphone, but the external microphones will almost always be preferred. Make sure your microphone is securely plugged into the jack behind that door.
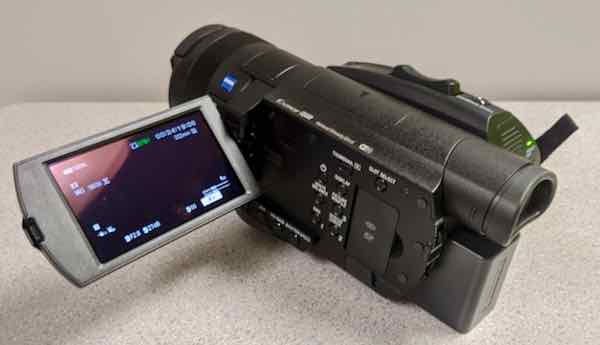
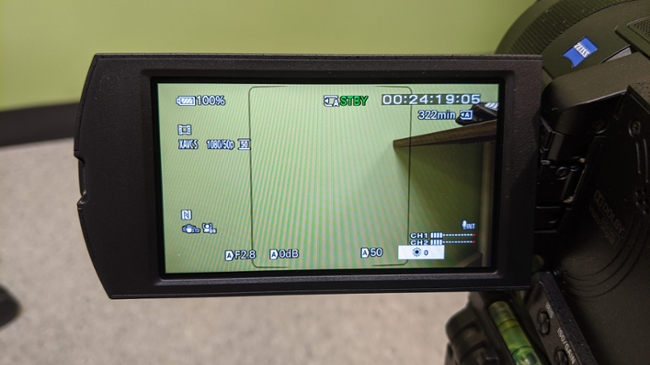
Here is a view of the camera with the display open. Note in the bottom-right-hand corner of the display is an indication of audio levels. (The CH1 and CH2 meter indications). You should see these moving when the person is speaking to the camera. If not, you will need to double-check your microphone + microphone connections.
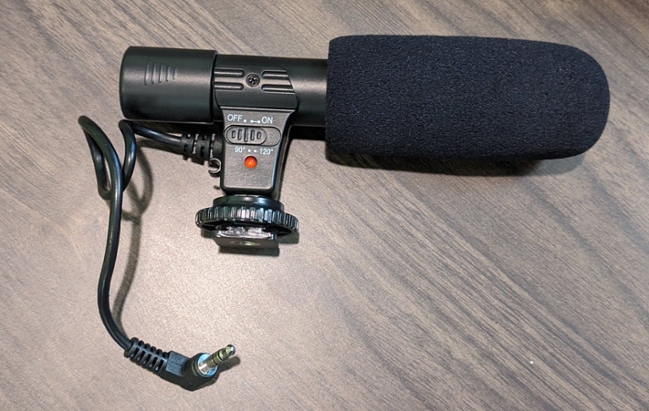
Here is a photo of the shotgun microphone. If you use this, be sure and turn on it's power. Note the "off/on" switch and lower LED on the base of the microphone. It has it's own internal battery. The microphone can be attached onto the top of the camera.
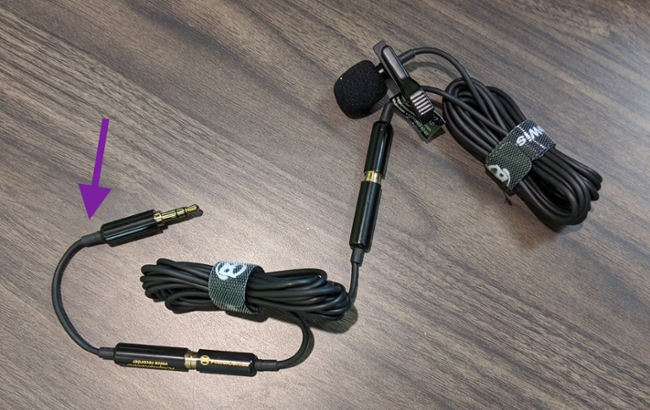
And finally, here is a photo of the lapel microphone. Clip the microphone to the collar or lapel of your shirt. Note that there are two cords, to provide up to 12ft of length. Please note the small adaptor cable (indicated by the arrow in the photo). You MUST use this to plug into the camera, as the camera requires a 3-conductor connection, while the microphone has a 4-conductor connection.
You can use the lapel mic OR the shotgun mic. You cannot use both at the same time. Remember that the shotgun mic is a directional mic. If you stand behind the microphone, it will not pick up much of your voice. Usually, the lapel mic is the preferred microphone.
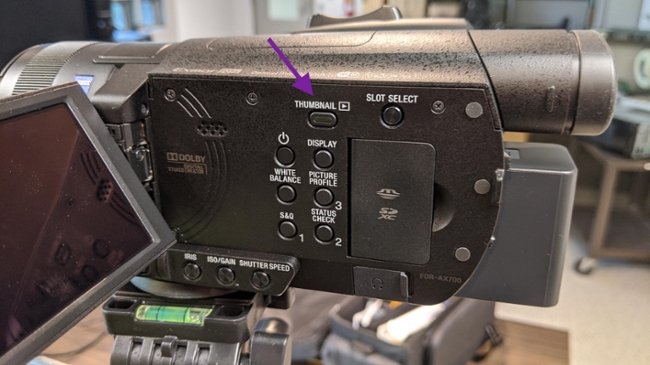
Here is a photo of the left side of the of the camera. The "play" indicator is beside the button labelled "Thumbnail". You can use that, along with the onscreen controls, to play back some video on the camera's display if you want to test your video. The memory card for the camera is located behind the "SDXC" door. Please remember to delete your files from the memory card before returning the camera.
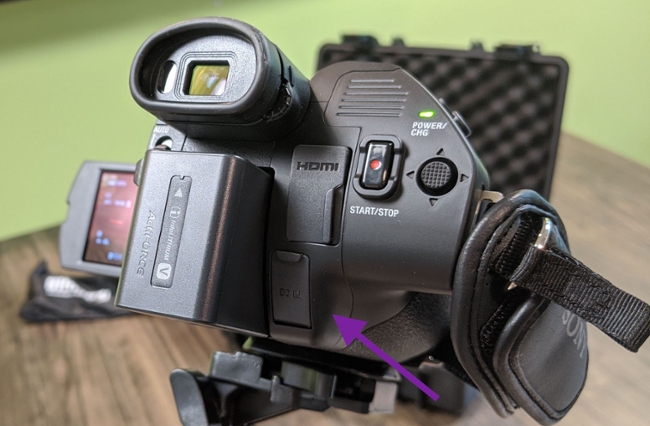
Here is a photo of the rear of the camera, which shows the camera battery, as well as the power connection. The power connection plug is behind the door which is indicated with the arrow.