Connecting to a Campus System via VNC (macOS)
Overview
This tutorial is for members of Science seeking to establish a VNC connection to a campus PC/server without having VPN access.
Audience
This tutorial is written for:
- Members of the Faculty of Science (faculty/staff/student)
- Those comfortable with computers and installing/configuring software
Prerequisites
To complete this tutorial, you must:
- Have a PC or server on campus that is already configured for VNC connections (including having a VNC server enabled and the correct firewall ports open)
- Know the hostname or IP address of the PC or server on campus to which you wish to connect
- Have requested and been approved for access to gate.sci.uwo.ca
- Be running macOS Catalina (10.15) or higher
- Have Java installed (instructions for macOS Catalina here)
Tutorial (Method 1: using TightVNC software)
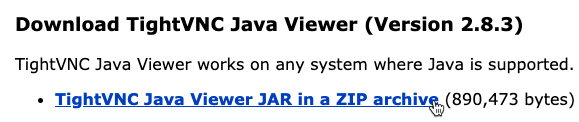
- Download and run the latest version of the TighTVNC Java Viewer (a
.zipfile).
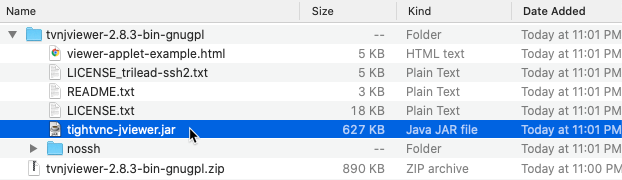
- Open the folder to which you saved the file in Finder and double-click the downloaded
.zipfile to extract its contents.

- Expand the extracted folder and double-click the tightvnc-jviewer.jar file.
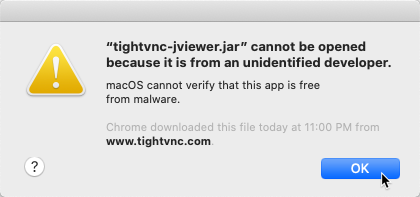
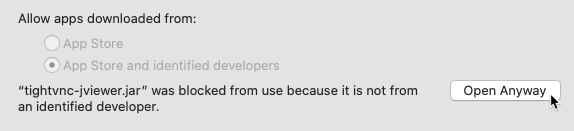
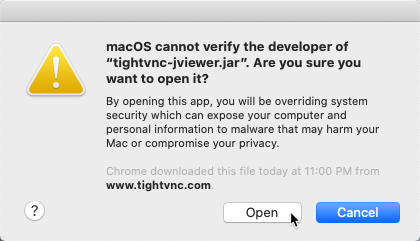
- If you receive a warning that the application originates from an unidentified developer, click OK.
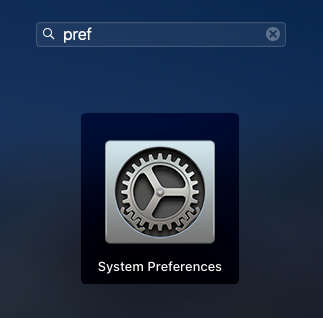
- Press F4 to open the Launchpad. Search for preferences and click the icon to open System Preferences.
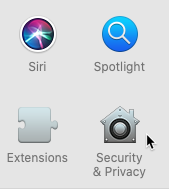
- Click Security & Privacy.
- On the General tab, click the Open Anyway button.
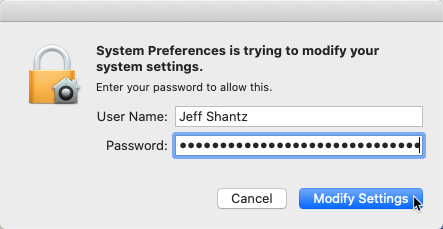
- When prompted, enter your username and password for your computer and click Modify Settings.
- Click Open to launch the program.
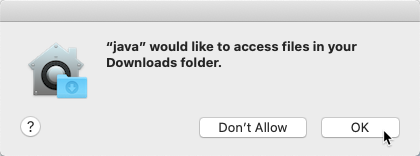
- If prompted for access to a folder, click OK.
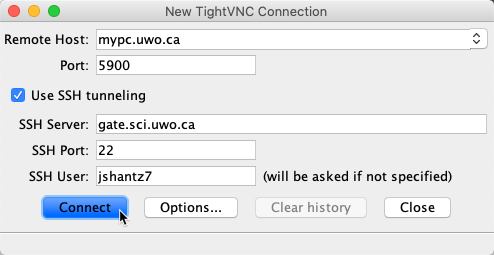
- Populate the following fields, replacing mypc.uwo.ca with the hostname of the PC or server on campus to which you wish to connect
Remote Host mypc.uwo.caPort 5900Use SSH tunneling Checked SSH Server gate.sci.uwo.caSSH Port 22SSH User Your Western username The example above assumes you have a PC on campus named mypc.uwo.ca that is listening on the default VNC port of 5900. If your VNC server is listening on a different display, you will need to modify this port number accordingly. For example, to connect to display
:1, you would choose port 5901.Click Connect.
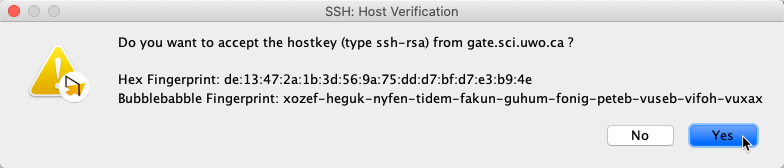
- If you receive a host verification warning, click Yes. This is normal and expected when connecting to a host via SSH for the first time.
- When prompted, enter your Western password to establish the SSH tunnel.
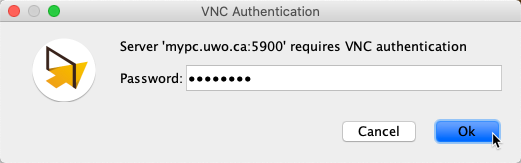
- When prompted, enter the VNC password that you configured on your campus PC or server and click OK.
- You should now be connected to the remote system via VNC.
- When you are finished with your session, simply close the TightVNC Viewer.
Tutorial (Method 2: using VNC built-in to MacOS)
VNC has been built-in to MacOS since version 10.4, so you can also use that option.
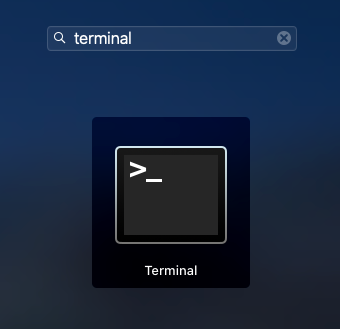
- Press F4 to open the Launchpad. Search for
terminaland click the icon to launch the application.
- Execute the following command to establish an SSH tunnel, replacing mypc.uwo.ca with the hostname of the PC/Mac or server on campus to which you wish to connect, and username with your Western username.
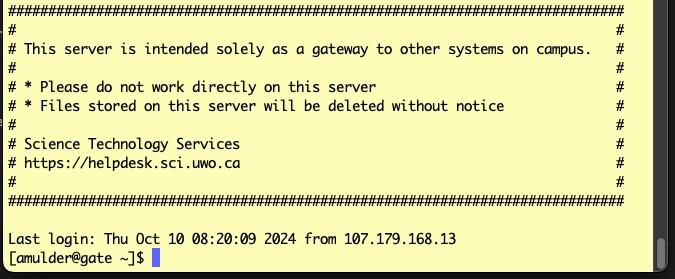
ssh -L 9001:mypc.uwo.ca:5900 username@gate.sci.uwo.caThe example above assumes you have a PC on campus named mypc.uwo.ca that is listening on the default VNC port of 5900. If your VNC server is listening on a different display, you will need to modify this port number accordingly. For example, to connect to display
:1, you would choose port 5901. To connect to this host, you will thenconnect to port 9001 on your home mac computer once the tunnel is established.
- If you receive a warning about the authenticity of the host, type
yesand press Enter. This is normal and expected when first connecting via SSH to a host. - When prompted, enter your Western password. Note that you will not be able to see what you are typing when entering your password.

- Once logged in, leave the Terminal window open.
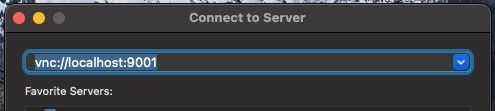
- From your (home) mac desktop, go to the menubar and pull-down the "Go" menu and select "Connect to Server... ⌘ K"
- In the pop-up window you would enter "vnc://localhost:9001" into the server field. (you may also want to save this to the list of favourites for future use)
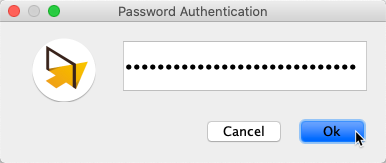
- When prompted, enter the VNC password that you configured on your campus Mac/PC or server and click OK.
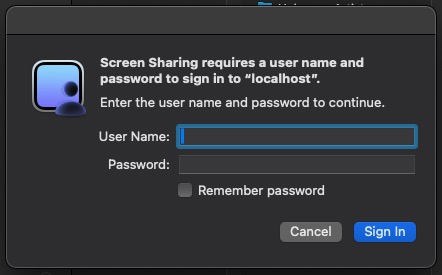
- You should now be connected to the remote system via VNC. (If your remote system is screen-locked you will need to enter your ID+Password to unlock it:
- When you are finished you can close the "Screen Sharing" window, and then logout of gate.sci.uwo.ca

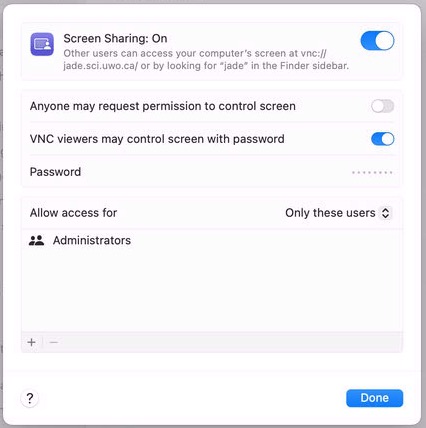
Setting up VNC server on your Mac
To enable VNC logins on your mac -- that is, so you can use VNC to remotely login to your office Mac -- Open up System Settings on your mac and search for Sharing
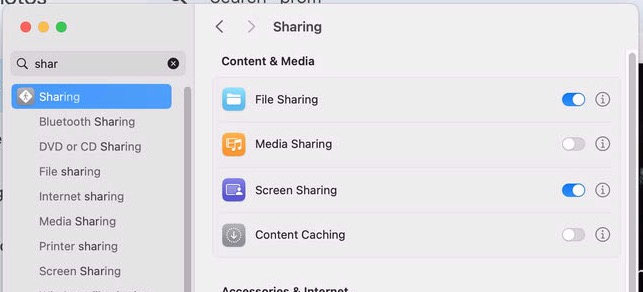
Enable Screen Sharing, then click the "I" icon on the right
In the Pop -up window set your VNC connection password. You can also choose who to allow access to -- in this example it is restricted to users who are also members of the Administrators group on the host Mac